
~ Alaska Museum of Fancy Knots ~

~ Star Knots ~
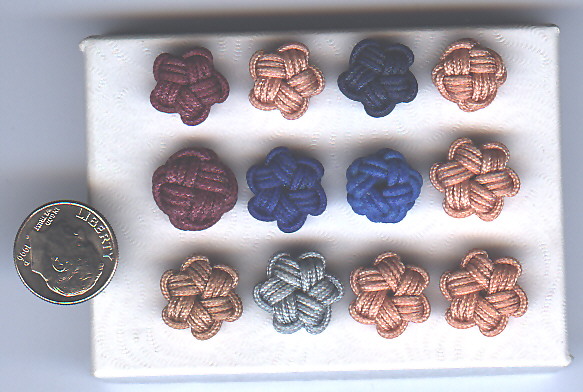
~ Fishing Hat Pins / Tie Tacks ~
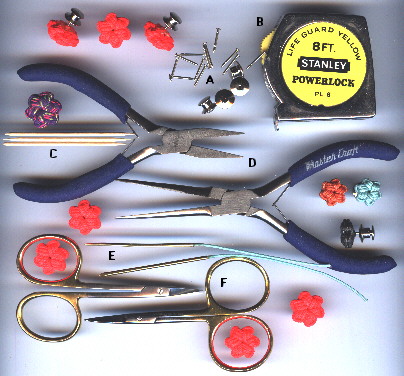
Diagram 1
To make "Fishing Hat Pins" you will need:
A. pins/backs
B. measuring tape
C. toothpicks
D. pliers (needlenose/duckbill)
E. "self-threading" needles
F. scissors (fly tyer's scissors)
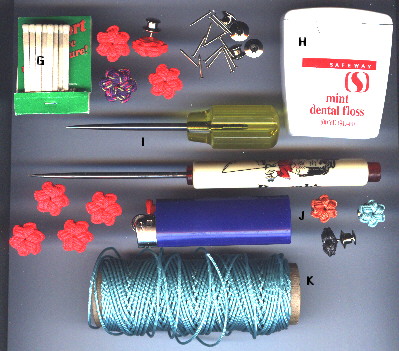
Diagram 2
....and:
G. paper matches
H. dental floss (waxed)
I. Ice-pick awls
J. BIC lighter
K. 1.4mm venetian blind cord (1/16" Yale!)
Diagram 3
To start, cut 6 strands of 1.4mm cord @ 18"-20". This will make 3 Star Knot pins. I have found that to cut the cords longer to make more than 3 knots, the cords become frayed from just the friction of making knots. I have found that 3 knots is about the limit to make and keep the cords looking nice.

Diagram 4
Tye the cords securely with dental floss.
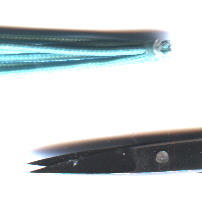
Diagram 5
Cut the cords close to the dental floss. (do not melt yet!)
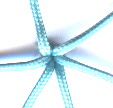
Diagram 6
Make sure the cords are symmetrical!
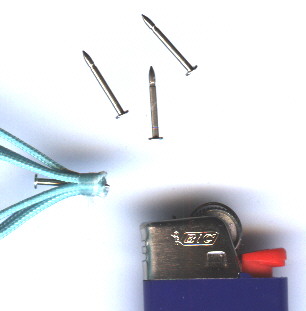
Diagram 7
Push the pin into the knot until the tip barely shows through! (You will be melting the cords and if the pin is pushed through all the way, the metal will become red hot and this will really cause problems!)...
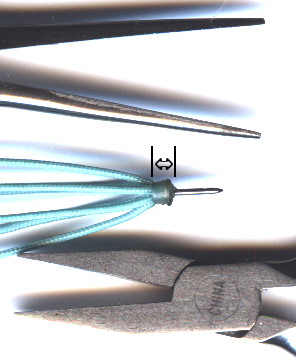
Diagram 8
Melt the 6 cords and immediately push the pin in and then squeeze the end using the needlenose/duckbill pliers (your choice!)...(Note on the pliers: make sure you polish these pliers!...I actually file the faces down (just enough to get any grease off...then I polish the faces with brass polish...the faces have to be completely dirt/grease free!)
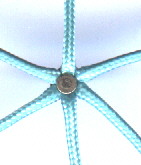
Diagram 9
This is how the end will look with the pin pushed in.
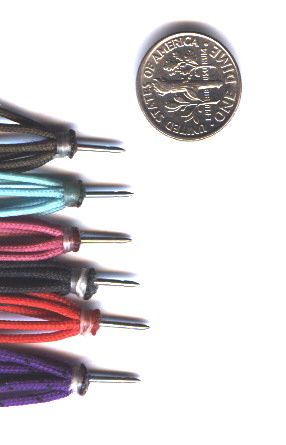
Diagram 10
Make a bunch of these "preps"!!...different colors/cords.
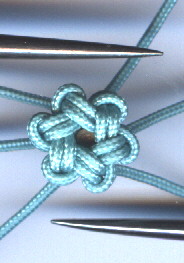
Diagram 11
Start making the Star Knot...when you come to this point, use the ice-pick awls to make the knot look right! It should be very symmetrical and it is easier to work the knot at this point than to try to correct mistakes later!!
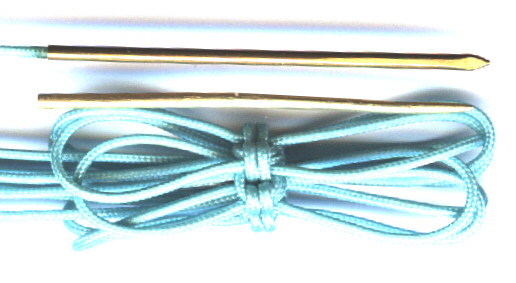
Diagram 12
When you get to this point (a mess!) then you know you are making the knot right!!...Use the loops to get leverage to finish tightening the knot.
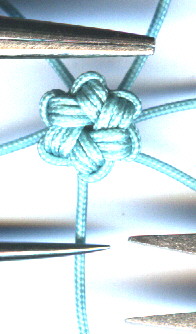
Diagram 13
Use the awls and pliers (you make these knots flat exactly like the 3mm knots except you use the pliers instead of using a bottle!) to make your knot look nice!
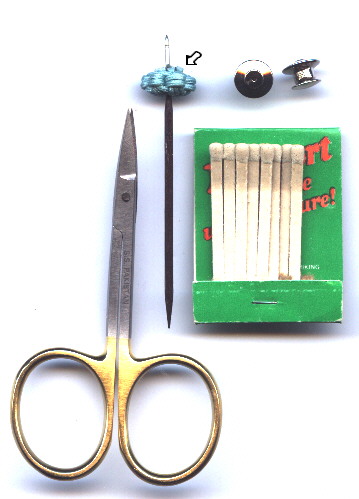
Diagram 14
Snip the ends using the fly tyer's scissors...stick the knot on a toothpick (i had to paint the toothpick black so it would show up on this photo...you don't paint the toothpick!) and using a paper match you will be able to melt the ends. After you have melted the ends, use the pliers to flatten the knot out...use the awl to do a final touch-up.
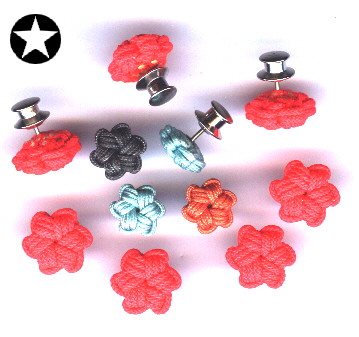
Diagram 15
~ All Done ~
...there are a couple of chapters in the Ashley Book of Knots on "Multi-Strand Button Knots"...---
**********

 BACK ~~~~~~~~~~~~ MAIN PAGE ~~~~~~~~~~~~ Next