
~ Alaska Museum of Fancy Knots ~

~ Star Knots ~
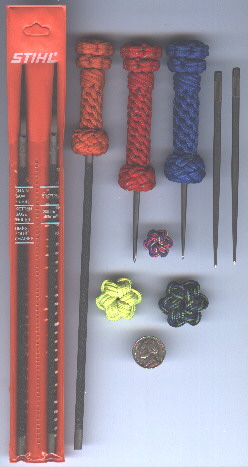
Diagram 1
The first knot book I bought over 25 years ago was The Marlinspike Sailor by Hervey Garrett Smith. It had the directions for the Star Knot. I tried to tye it and after about a year I finally gave up. After another year I finally tyed my first Star Knot with the help of another knot tyer. It was not tyed the same way as these directions, as I didn't even have a needle! There are quite a few books with the directions for making Star Knots:
The Ashley Book of Knots by Clifford W. Ashley
The Marlinspike Sailor by Hervey Garrett Smith
The Complete Book of Decorative Knots by Geoffrey Budworth
Knots, Splices and Fancy Work by Chas.L. Spencer
Creative Ropecraft by Stuart E. Grainger
The Harrison Book of Knots by P. P. O. Harrison
...these are all excellent knot books and as all Star Knots are made the same way, any of these books should be used as a reference while making Star Knots from the directions on these pages. To start out, a couple of simple projects is to make a handle for a chain saw file and a handle for an ice pick.
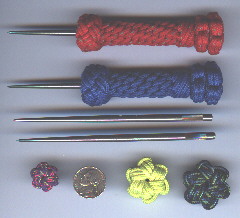
Diagram 2
Ice picks have many uses. I make these for fly fishermen who use them in their fly tying. There are many Star Knot projects to make and making an ice pick handle is an easy project to start out with in learning how to make Star Knots.
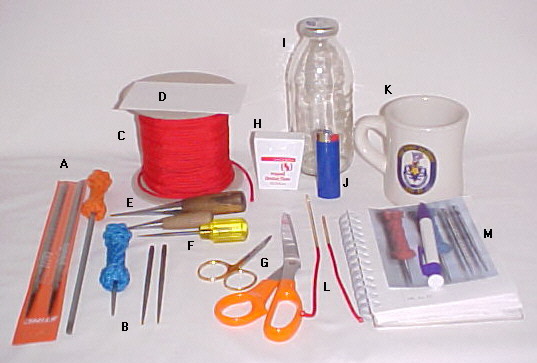
Diagram 3
Tools
Here are the tools needed to make the chainsaw file handle and the ice pick handle:
A. chainsaw files
B. ice picks
C. cord (3mm paracord)
D. white index cards
E. Japanese Marlinespikes
F. ice pick awl
G. scissors (small & large)
H. dental floss (waxed)
I. bottle
J. BIC lighter
K. (bos'n mug)
L. "self-threading" needles
M. notebook
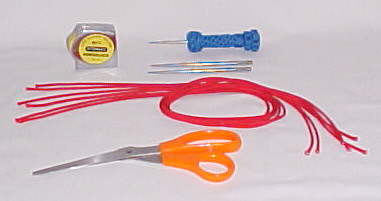
Diagram 4
For these two projects cut 6 strands of 3mm paracord 28".
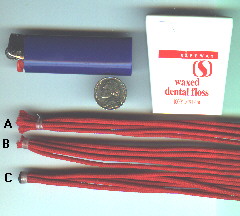
Diagram 5
Using dental floss, use half hitches to bind the ends of the six cords securely.
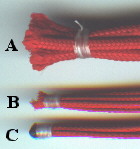
Diagram 6
A better view of the ends:
A. tye the end securely with dental floss
B. cut flush close to the dental floss
C. melt the ends together with a BIC lighter.
Make sure these ends are secure!
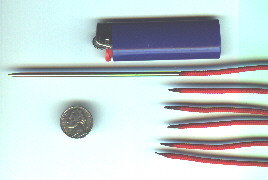
Diagram 7
Melt tapers on the other ends for the "self-threading" needle using a BIC lighter.
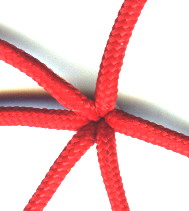
Diagram 8
In tying the six cords together, make sure that the 6 cords are symmetrical!
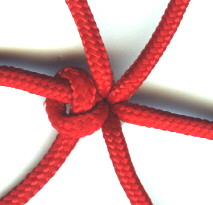
Diagram 9
Begin making the Star Knot with a "Single Hitch".
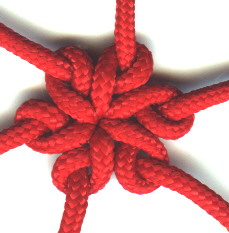
Diagram 10
Continue making the single hitches on all 6 cords. There are a couple of ways of making these hitches, but I will leave it up to you how you make them. These photos should be as explanatory as you will need in making the first step in making a Star Knot. In making Star Knots the first steps are as important as the last steps and these hitches should be as symmetrical as you can make them. They should be fairly tight, but you will be passing the needle through the knot twice more in making the Star Knot. At this point symmetry is more important than the tightness of the hitches. The best teacher is experience and the best way to learn how tight to make these hitches is to make a lot of Star Knots!
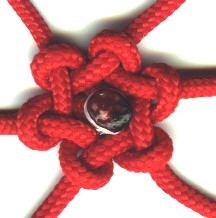
Diagram 11
This a view of the back of the knot after you have made the hitches.
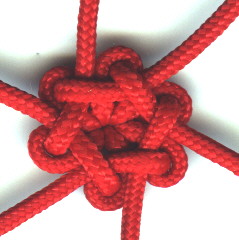
Diagram 12
Now make a "Crown Knot".
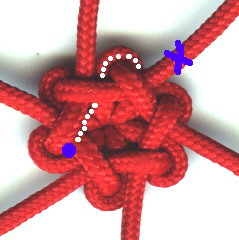
Diagram 13
Now using the "self-threading" needle, each cord will go as shown in the photo. If it helps, use the books on Star Knots as a reference.
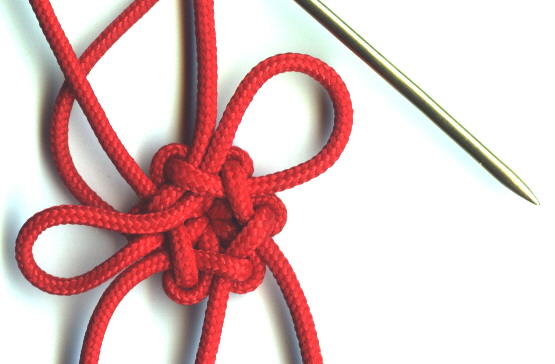
Diagram 14
At this point you should leave "thumb-sized" loops before you tighten up. In making Star Knots, I am constantly tightening/pulling/tugging, etc. the knot to keep it's shape and these little "thumb-sized" loops make it easier to do. Using the loops, finish off this part of the knot as symmetrical as possible.
**********

 Lump ~~~~~~~~~~~~ MAIN PAGE ~~~~~~~~~~~~ Next