
~ Alaska Museum of Fancy Knots ~

~ Star Knots ~

Diagram 15
Tighten the loop making sure to retain the tension/symmetry.
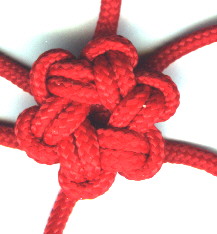
Diagram 16
This is how the Star Knot will look after the top cords are doubled. How the knot looks at this point will determine how the knot will look at the finish! I use the small "Japanese Marlinespike" and the ice pick awl to work the knot at this point to make it look as symmetrical as possible.
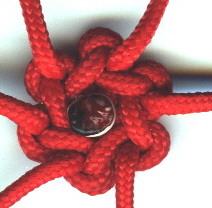
Diagram 17
The next step will be from the back of the knot.
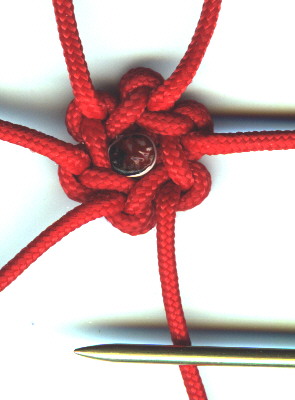
Diagram 18
Using the "self-threading" needle...
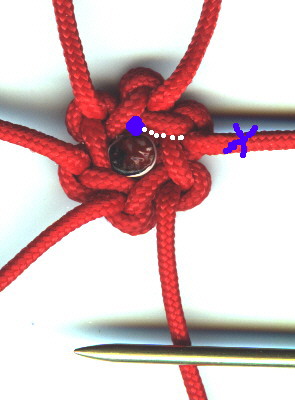
Diagram 19
...each cord will go through the knot from back to front.
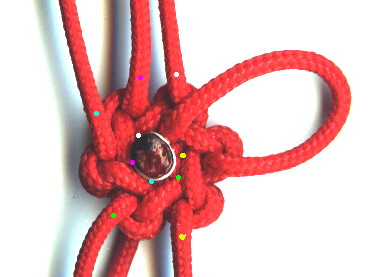
Diagram 20
Each cord will go through the knot from back to front. You will find that this step is not hard to do at all once you find where the needle goes. There is nothing in the way of the needle and it will go through the knot easily. At this point I make the Star Knot a little different than in every knot book I've seen. I leave a "thumb-sized" loop. There are two reasons to leave the loop:
A. You will use this loop for leverage to tighten the knot later.
B. In every knot book I've seen this loop is shown as being tightened. Actually, when it is tightened at this point it will be in the way of the cord going through the knot during the next step! By leaving the loop, the next step will be much easier.
This photo should be as explanatory as needed to show where each cord will go through the knot. If it helps, you can use one of the books on Star Knots as a reference.
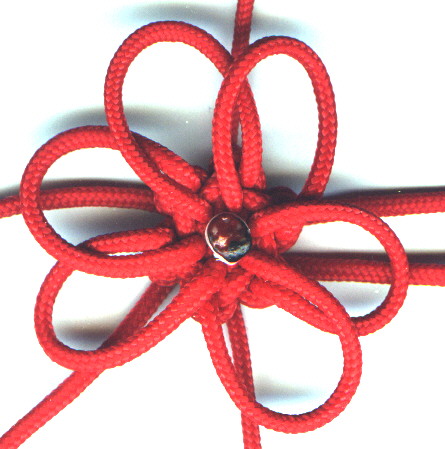
Diagram 21
Each cord will be left as a "thumb-sized" loop.
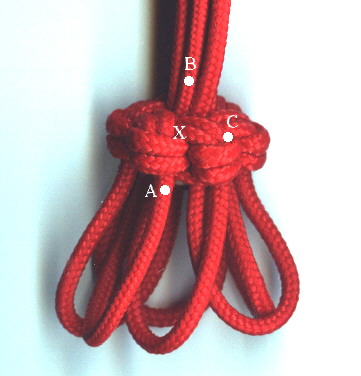
Diagram 22
This next step can be a bit confusing at first. Each cord has to go through the knot once again to finish it off. It may look like the cord "B" (the other end of cord "A") naturally falls into place at "X"...but it doesn't!...it goes one place counter-clockwise (at "C"). This step is not explained in most books, and it is very important.
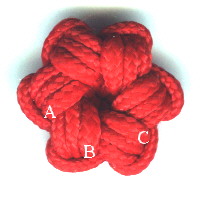
Diagram 23
Here is what happens when each cord is placed where it looks like it should naturally fall. This Star Knot was made to show what happens. This is not the way a Star Knot should look! "A" should be where "B" is. "B" should be where "C" is, etc.
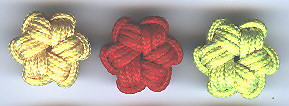
Diagram 24
This photo shows properly made Star Knots.
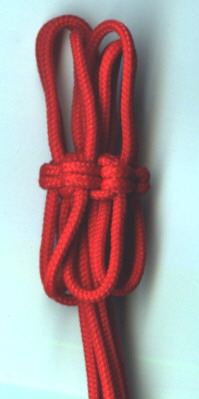
Diagram 25
Each cord will now go from front to back. As shown in the books on Star Knots, each cord goes under 4 cords. In the books, the 4th cord is shown as being tight at this point (and in the way of the needle!). Because this 4th cord is shown as a "thumb-sized" loop, it will not be in the way of the needle. This step is not hard at all if your needle has a proper "Star Knot" tip! One trick you may find helpful is to use the large "Japanese Marlinespike" to find the "path" of the needle and you will find that immediately upon removing the "Japanese Marlinespike", the needle will easily find the way. There may be quite a bit of pressure on the brass needle. By using the "Japanese Marlinespike" a lot of the tension will be removed. With "thumb-sized" loops on both sides of the knot, it may look like you have a real mess!!...but all that's left now is to tighten the knot up, and by using the loops for leverage, you will find that tightening up the knot is not hard at all.
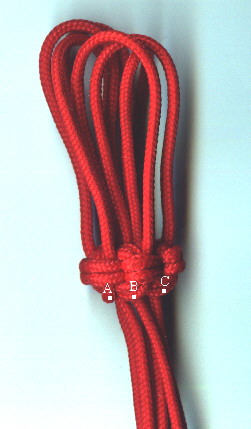
Diagram 26
Pull the bottom loops fairly tight by pulling from the top. At this point the important thing to remember is that the "back cords" on the bottom (A,B,C,etc) have to be as tight (or even just a little tighter) than the outside cords. This is done while tightening the top cords. Actually you will be tightening both sides of the knot during the final step of tightening the top cords.
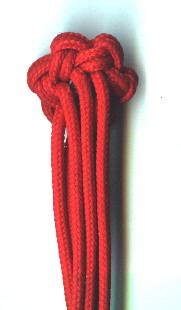
Diagram 27
As shown, this is how the bottom cords should look. The inside cord should be as tight as the outside cord.
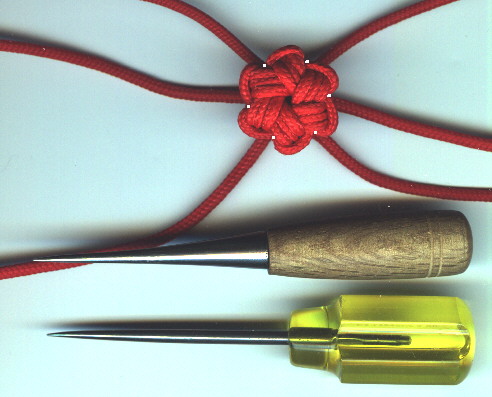
Diagram 28
The next step is to make the knot look nice. I use the small "Japanese Marlinespike" (or/and the ice pick awl). You can dig the awl into the knot from the side and pry up any of the 3 cords to make them look symmetrical. The awl goes into the knot where no mark/distortion will be left. You will find that it is easy to make the Star Knot look nice by using the awl.
**********

 BACK ~~~~~~~~~~~~ MAIN PAGE ~~~~~~~~~~~~ Next